Asset Settings
The Asset Settings section is used to manage files and media resources that are stored within the Supista workspace. Assets may include images, branding elements, documents, or other reusable files that can be referenced across different parts of the platform.
Instead of uploading the same files repeatedly across modules or components, Supista allows administrators to store these resources in a centralized asset library. Once uploaded, assets can be reused wherever file references are required within the system.
This approach simplifies file management and ensures consistency across the workspace.
Accessing Asset Settings
Follow these steps to open the Asset Settings page.
Step 1: Open the left navigation sidebar.
Step 2: Click Settings.
Step 3: Select Assets Settings from the Settings menu.
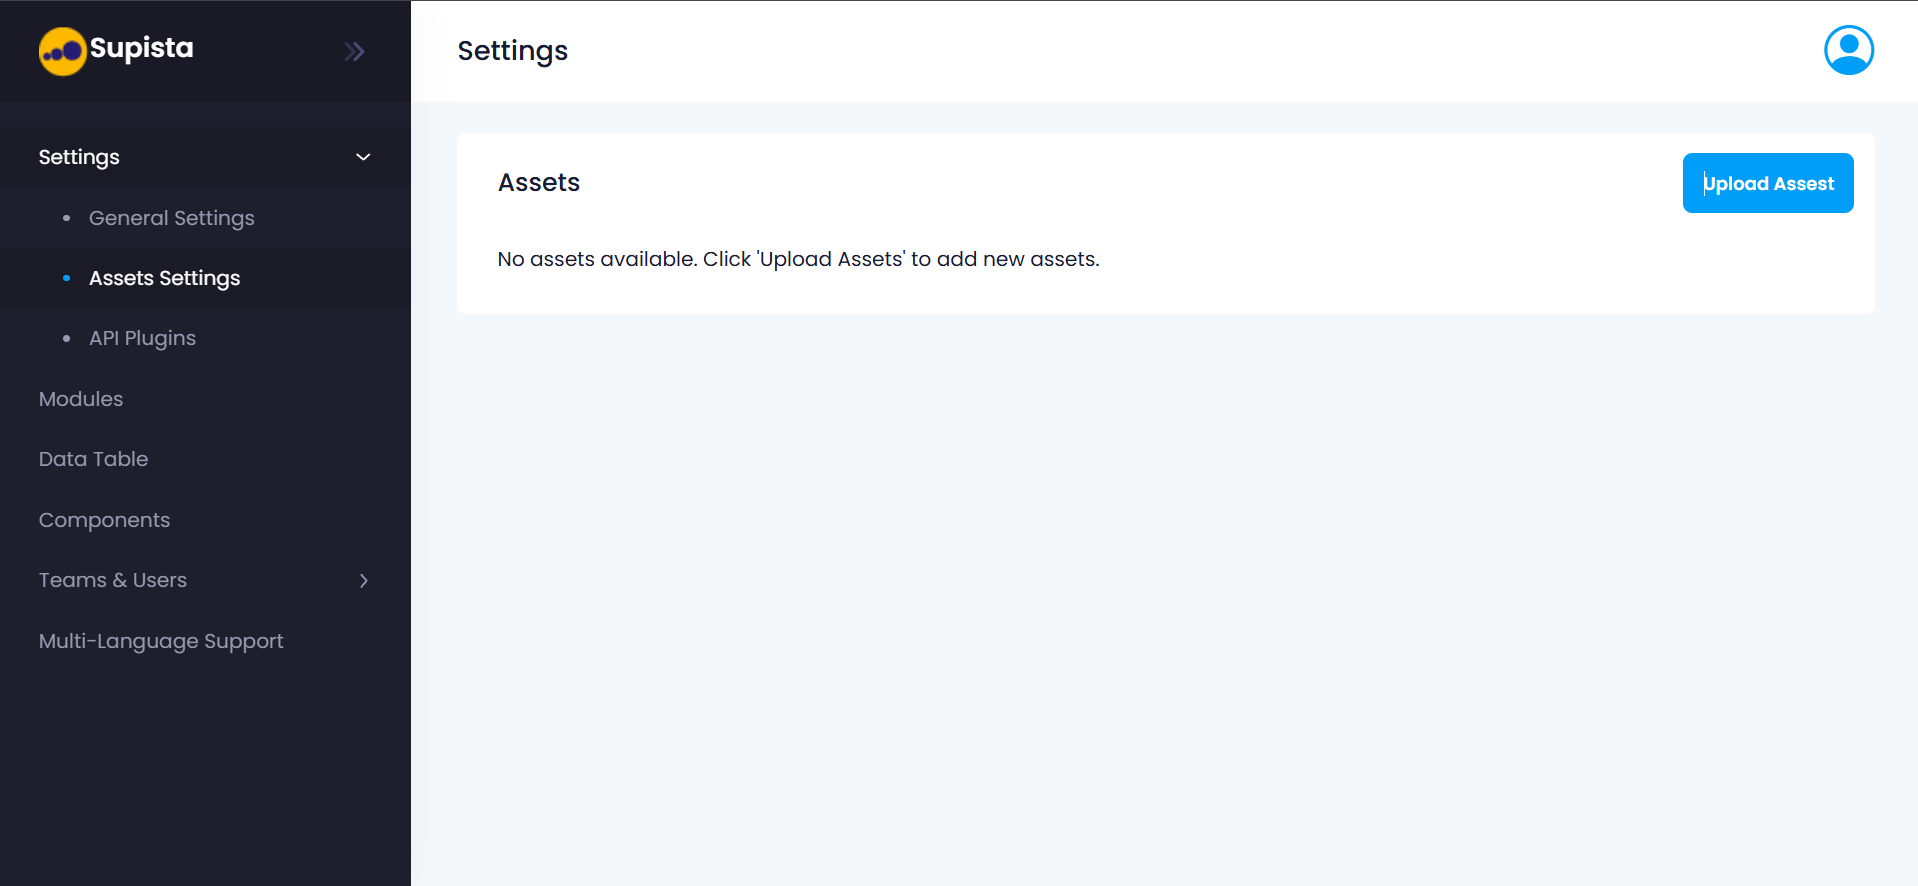
The Assets page will appear, displaying the list of uploaded assets. If no assets have been uploaded yet, the page will display a message indicating that no assets are currently available.
Asset Settings Interface
Understanding the Asset Settings Page
The Asset Settings page contains the following elements:
Assets Panel
The central section of the page displays the Assets panel.
This panel shows:
- Uploaded assets
- Asset names
- Management options for each asset
If no files exist in the system, the message below appears:
No assets available. Click 'Upload Assets' to add new assets.
Upload Asset Button
Located on the top right of the Assets panel, the Upload Asset button allows administrators to add new files to the asset library.
Clicking this button opens the Upload Asset dialog window.
Uploading a New Asset
To add a file to the asset library, follow these steps.
Step 1: Navigate to Settings → Assets Settings.
Step 2: Click the Upload Asset button.
A dialog window titled Upload Asset will appear.
Upload Asset Dialog Window
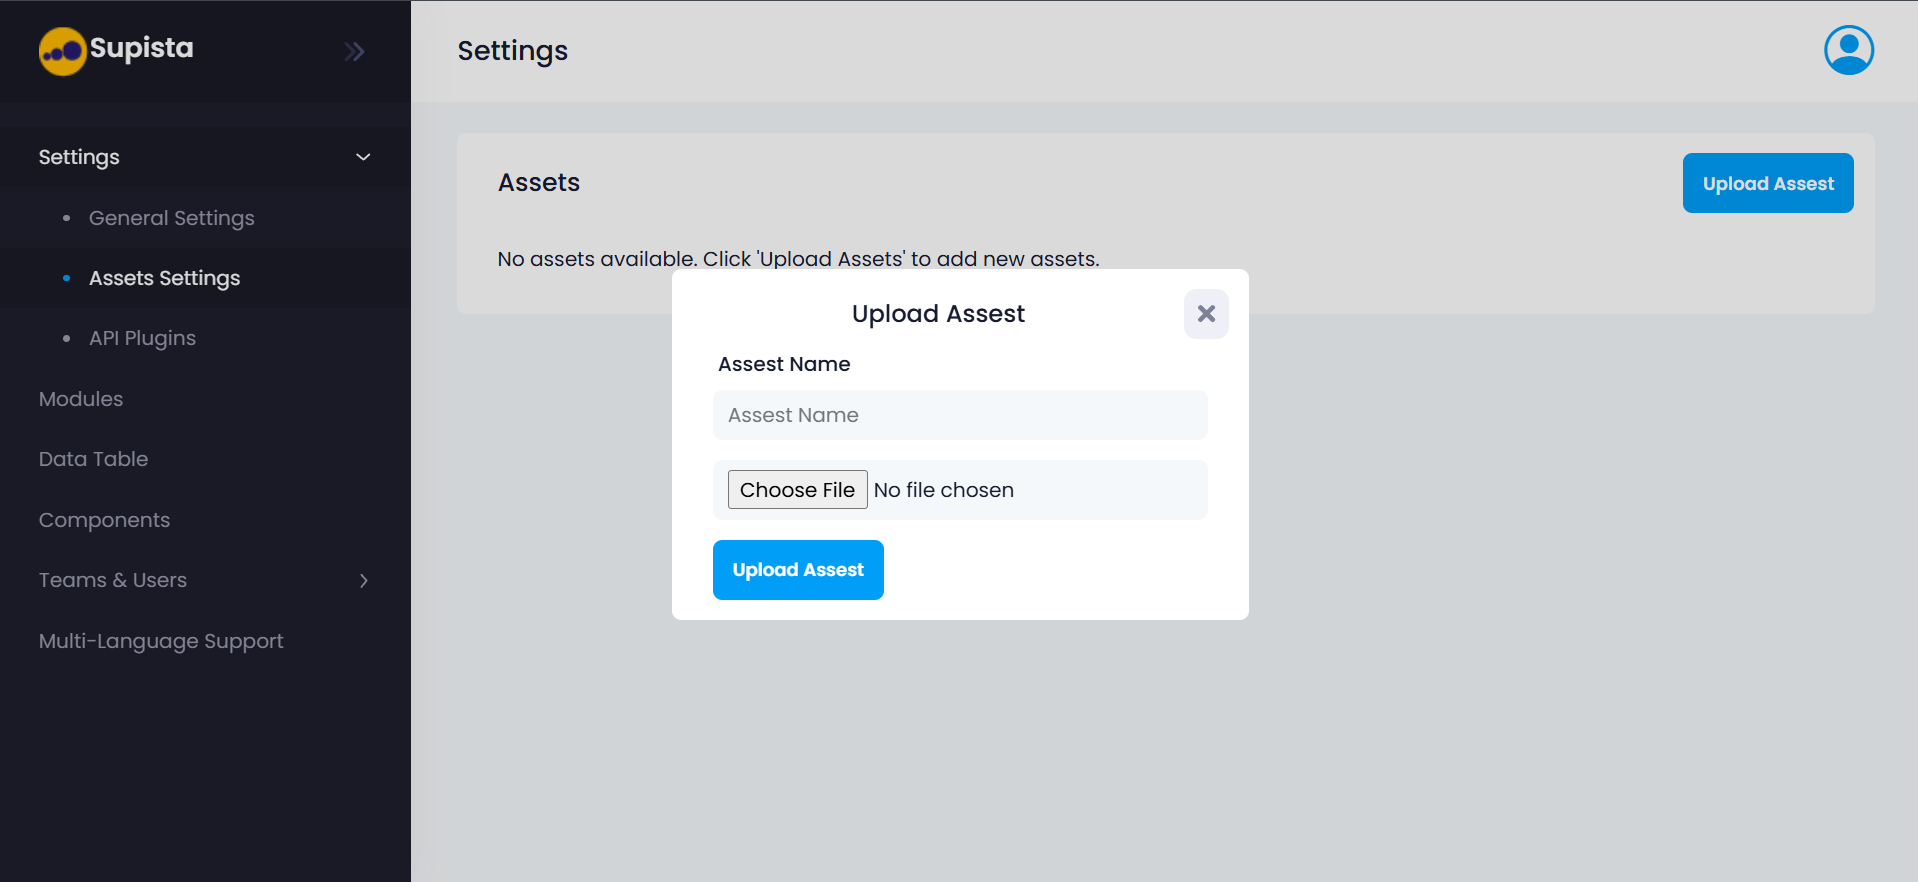
Step 3: Enter the Asset Name.
The Asset Name acts as the identifier used within Supista to reference the file. Choose a name that clearly represents the purpose of the asset.
Examples include:
- Company Logo
- Dashboard Header Image
- Report Banner
Step 4: Click Choose File.
A file selection window will open.
Step 5: Select the file from your local system.
Supported files may include images or other media resources depending on system configuration.
Step 6: Confirm the selected file.
The file name will appear next to the Choose File button.
Step 7: Click Upload Asset.
The file will now be uploaded and stored within the Supista asset library.
Upload Asset Dialog Window Fields
The Upload Asset window contains the following fields:
Asset Name
This field defines the name used to identify the asset within Supista.
Administrators should use clear naming conventions to make assets easy to locate later.
Example naming patterns:
company_logodashboard_bannerreport_header_image
File Selection
The Choose File option allows the user to select a file from their local machine.
Once a file is selected, its name will appear beside the button to confirm the chosen file.
Upload Asset Button
The Upload Asset button finalizes the process and stores the file within the platform.
Once uploaded, the asset becomes available for reference across modules, components, and other platform features.
Close Button
The Close (X) icon in the dialog window allows the user to exit the upload process without uploading a file.
Managing Uploaded Assets
After uploading, assets appear within the Assets panel.
From here, administrators can:
- View uploaded assets
- Identify assets using their names
- Download or reference assets when required in the platform
Keeping assets organized in this section ensures that files remain easily accessible and reusable across the system.
Best Practices for Asset Management
To maintain an organized asset library, it is recommended to follow these practices:
• Use clear and descriptive asset names
• Upload assets once and reuse them across the platform
• Maintain consistent branding assets such as logos and banners
• Avoid uploading duplicate files
Following these practices helps keep the asset library structured and efficient.
Summary
The Asset Settings section provides a centralized location for managing all reusable media resources within a Supista workspace.
By allowing administrators to upload and organize files in one place, Supista ensures that assets remain accessible, reusable, and consistent across the platform.