Introduction To Modules
In Supista, a Module represents a complete functional domain within the ERP environment. It is the highest organizational layer used to structure business processes, operational workflows, data models, and user interfaces into a cohesive system.
Every operational capability within Supista exists inside a module. Without modules, the platform would consist of isolated data tables, disconnected components, and unrelated screens. Modules provide structure, hierarchy, and logical grouping, allowing organizations to build scalable ERP environments.
A module typically represents a specific business function within an organization. Examples of common modules include:
- Procurement Management
- Inventory Management
- Order Management
- Finance and Accounting
- Supply Chain Management
- Maintenance Management
Each module contains its own internal structure while remaining integrated with the broader Supista platform.
Module Hierarchy
Modules follow a layered architectural structure that organizes how applications are built inside Supista.
The hierarchy is structured as follows:
Module
└── Screen Groups
└── Screens
└── Components
Module
The module acts as the top-level container representing a business domain.
Screen Groups
Within each module, screen groups organize screens into logical sections. These act as navigation categories that group related functionality together.
Screens
Each screen represents a specific operational interface where users interact with the system.
Components
Screens are built using components, which define how data is displayed, edited, processed, or visualized.
This hierarchical model ensures the system remains structured, scalable, and maintainable, even as the ERP environment grows in complexity.
Accessing the Modules Section
To open the Modules page:
Step 1: Open the left navigation sidebar.
Step 2: Click Modules.
The Modules page will open and display all modules available within the workspace.
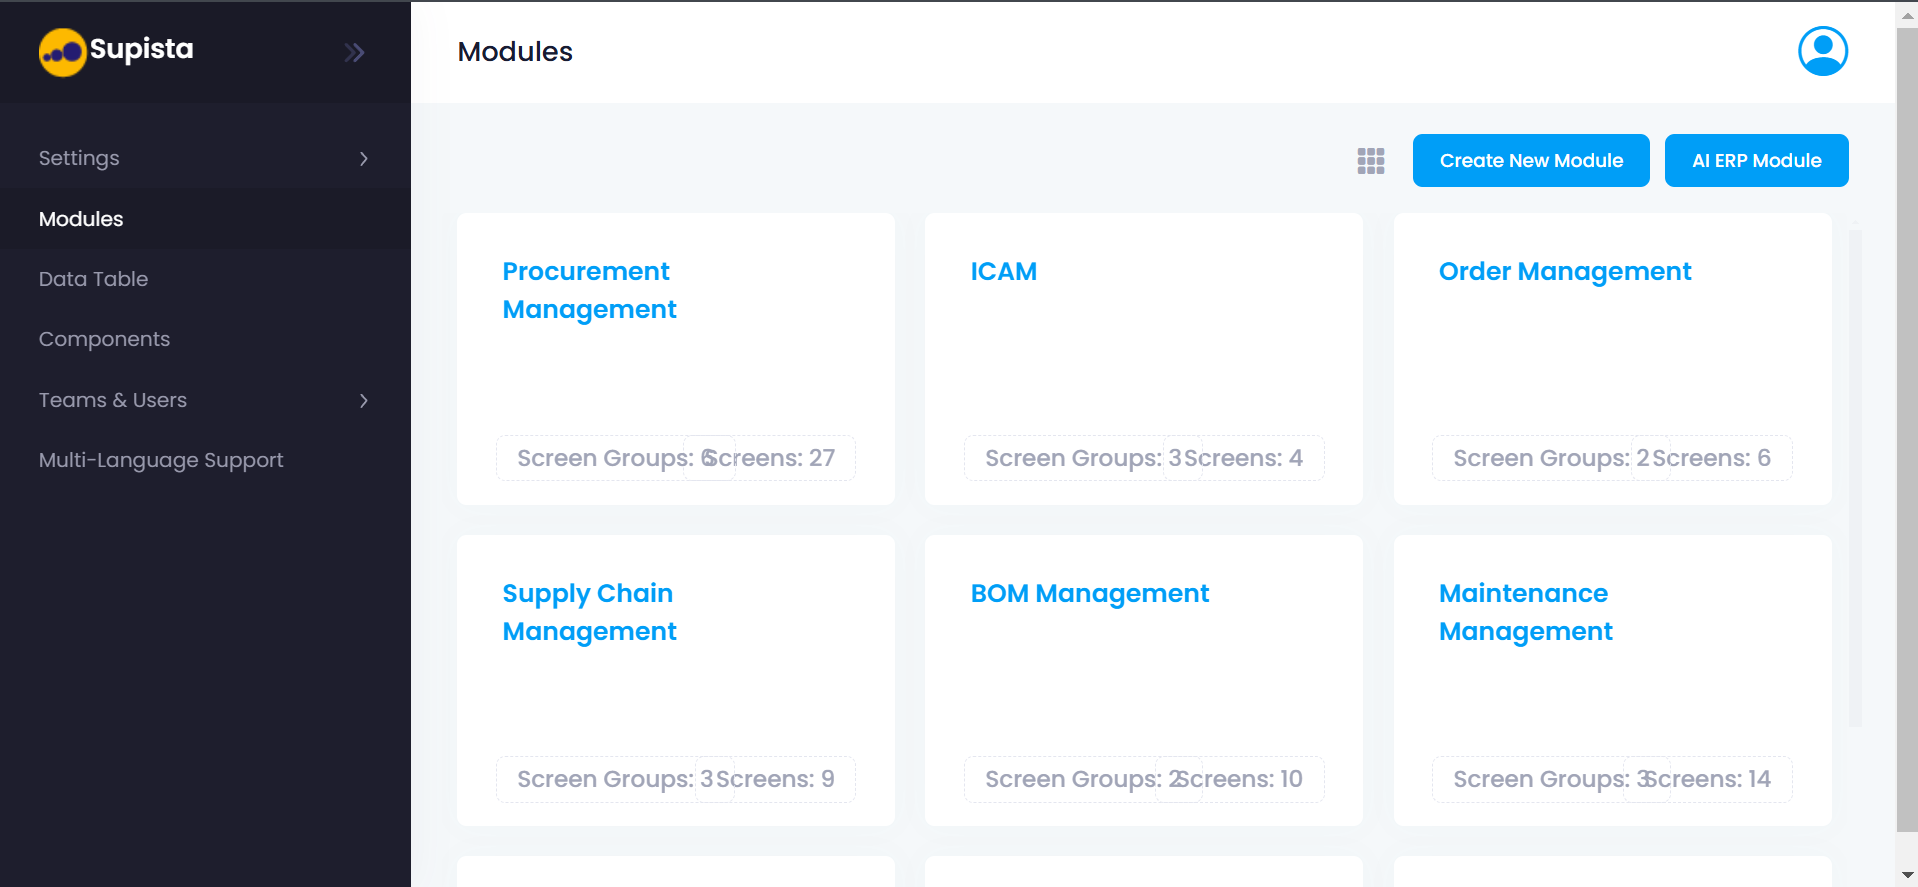
Modules Overview Interface
The Modules page provides a visual overview of all functional modules configured in the platform.
Each module appears as a card representing a specific operational domain.
From the interface shown in the image, the system currently includes modules such as:
- Procurement Management
- ICAM
- Order Management
- Supply Chain Management
- BOM Management
- Maintenance Management
Each module card contains important summary information that helps administrators understand the structure of that module.
Understanding Module Cards
Each module is displayed as a card tile in a grid layout.
A module card contains the following elements:
Module Name
The top section of the card displays the module name.
Examples:
- Procurement Management
- ICAM
- Order Management
The module name represents the business function that the module supports.
Screen Groups Count
The card displays the number of screen groups within the module.
Example:
Screen Groups: 6
Screen groups act as structural divisions inside the module and help organize related screens together.
Screens Count
The card also shows the number of screens contained in the module.
Example:
Screens: 27
Screens represent individual operational interfaces where users interact with data and workflows.
Module Overview Example
| Module | Screen Groups | Screens |
|---|---|---|
| Procurement Management | 6 | 27 |
| ICAM | 3 | 4 |
| Order Management | 2 | 6 |
| Supply Chain Management | 3 | 9 |
| BOM Management | 2 | 10 |
| Maintenance Management | 3 | 14 |
This overview allows administrators to quickly evaluate the size and complexity of each module.
Modules Layout Controls
At the top of the Modules page, the interface includes two important actions.
Create New Module
This option allows administrators to manually create a new module within the platform.
AI ERP Module
This option allows Supista to automatically generate ERP modules using AI-assisted configuration.
These options enable organizations to build modules either manually or through AI-assisted generation.
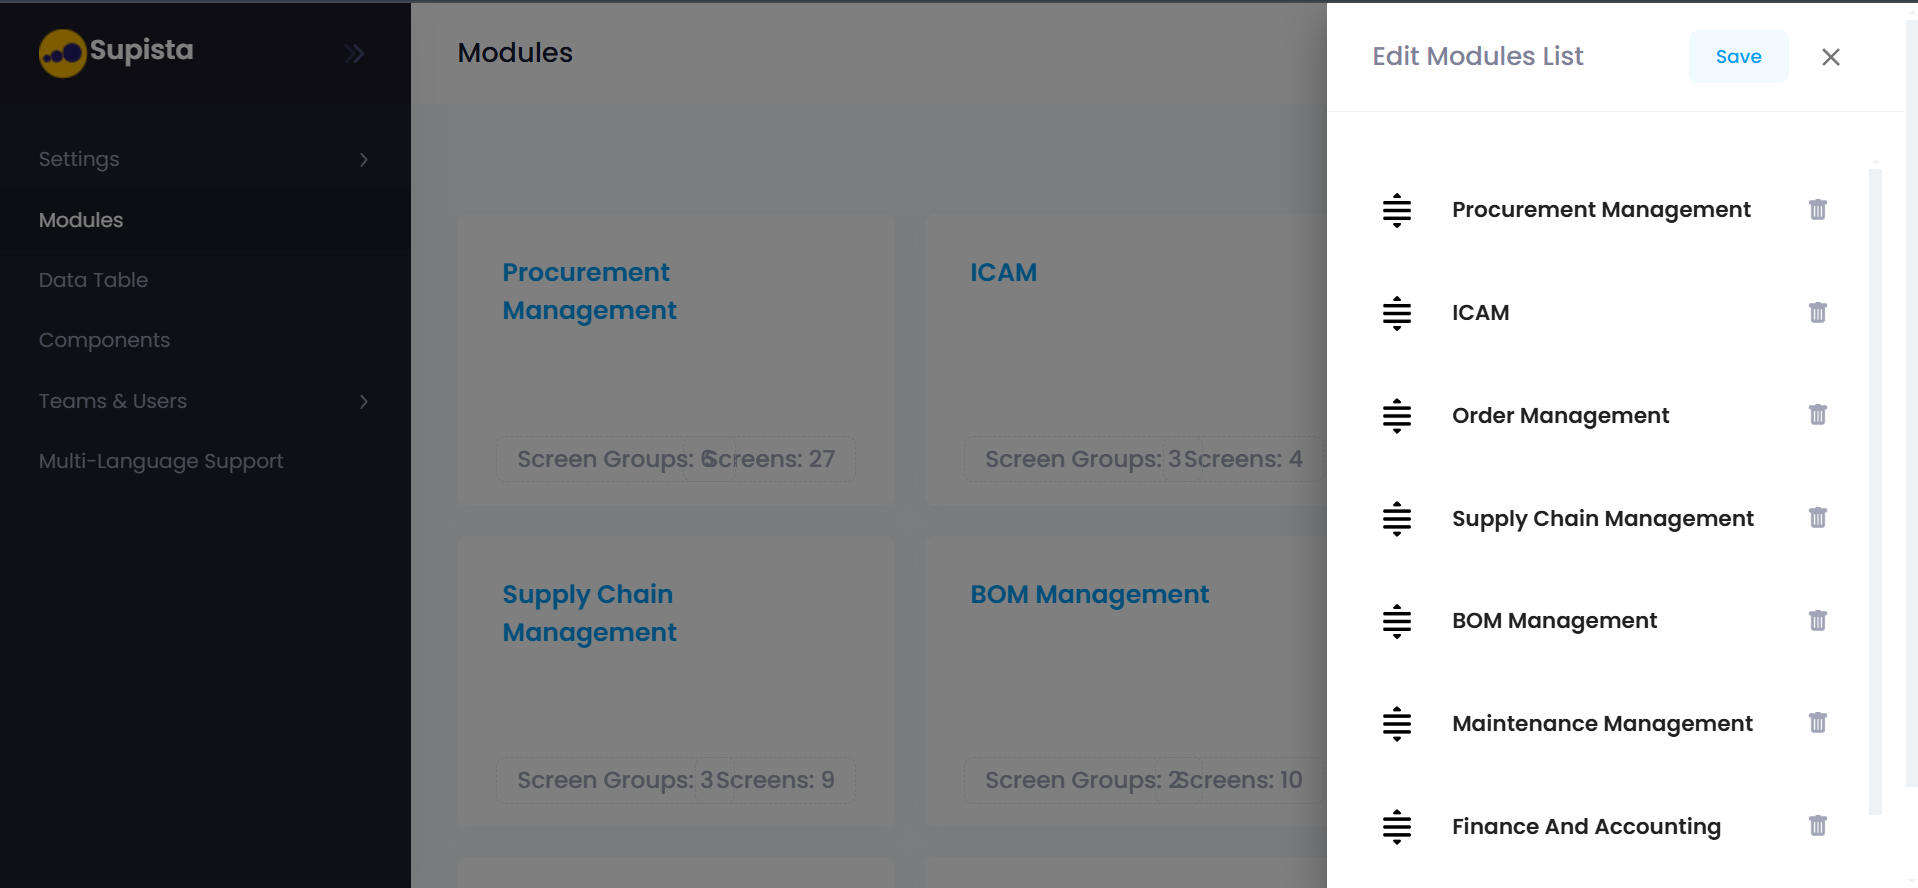
Editing Module Order
The Modules interface also includes an Edit Modules List panel that allows administrators to manage how modules are arranged.
When this panel is opened, the system displays a sortable list of modules.
The list shown in the image includes modules such as:
- Procurement Management
- ICAM
- Order Management
- Supply Chain Management
- BOM Management
- Maintenance Management
- Finance and Accounting
Each module entry contains the following controls.
Drag Handle
The icon on the left side allows users to drag and reorder modules.
Changing the order affects how modules appear in the system interface.
Delete Icon
The trash icon allows administrators to remove a module from the system.
Deleting a module removes its associated configuration and structure.
Save Button
After rearranging modules, clicking Save applies the new ordering.
Close Button
The X icon closes the module editing panel without saving changes.
Purpose of the Modules Section
The Modules section serves several important functions within Supista:
- Organizes ERP capabilities into structured domains
- Provides a high-level overview of system functionality
- Enables administrators to manage the ERP architecture
- Allows quick navigation between business functions
- Supports scalable expansion of the platform
Modules form the foundation of the Supista ERP architecture.
Next Steps
To learn how modules are created and configured, continue with the following sections.
Create New Module
Learn how to manually create and configure a new module.
AI ERP Module
Learn how Supista can automatically generate ERP modules using AI.