Role Access
The Role Access tab controls which teams are allowed to access the component and what actions they are permitted to perform on the data inside it. This section is used to implement security and permission management within the system.
In most operational systems, not every user should be able to perform every action. Some teams may only be allowed to view data, while others may be responsible for creating, updating, or deleting records. The Role Access configuration ensures that each team can only perform actions that are appropriate for their responsibilities.
For example, a Procurement team may be allowed to create and update vendor records, while a Finance team may only be allowed to view financial information.
Role Access therefore acts as a governance layer that ensures users interact with system data in a controlled and structured way.
Opening the Role Access Section
To configure access permissions for a component:
Step 1: Open the Components section from the left navigation panel.
Step 2: Select the component that you want to configure.
Step 3: Click the Role Access tab located in the top menu of the component configuration page.
The Role Access configuration screen will open, allowing administrators to define permissions for teams that interact with the component.
This page is used to configure table-level permissions and column-level permissions.
Selecting the Table
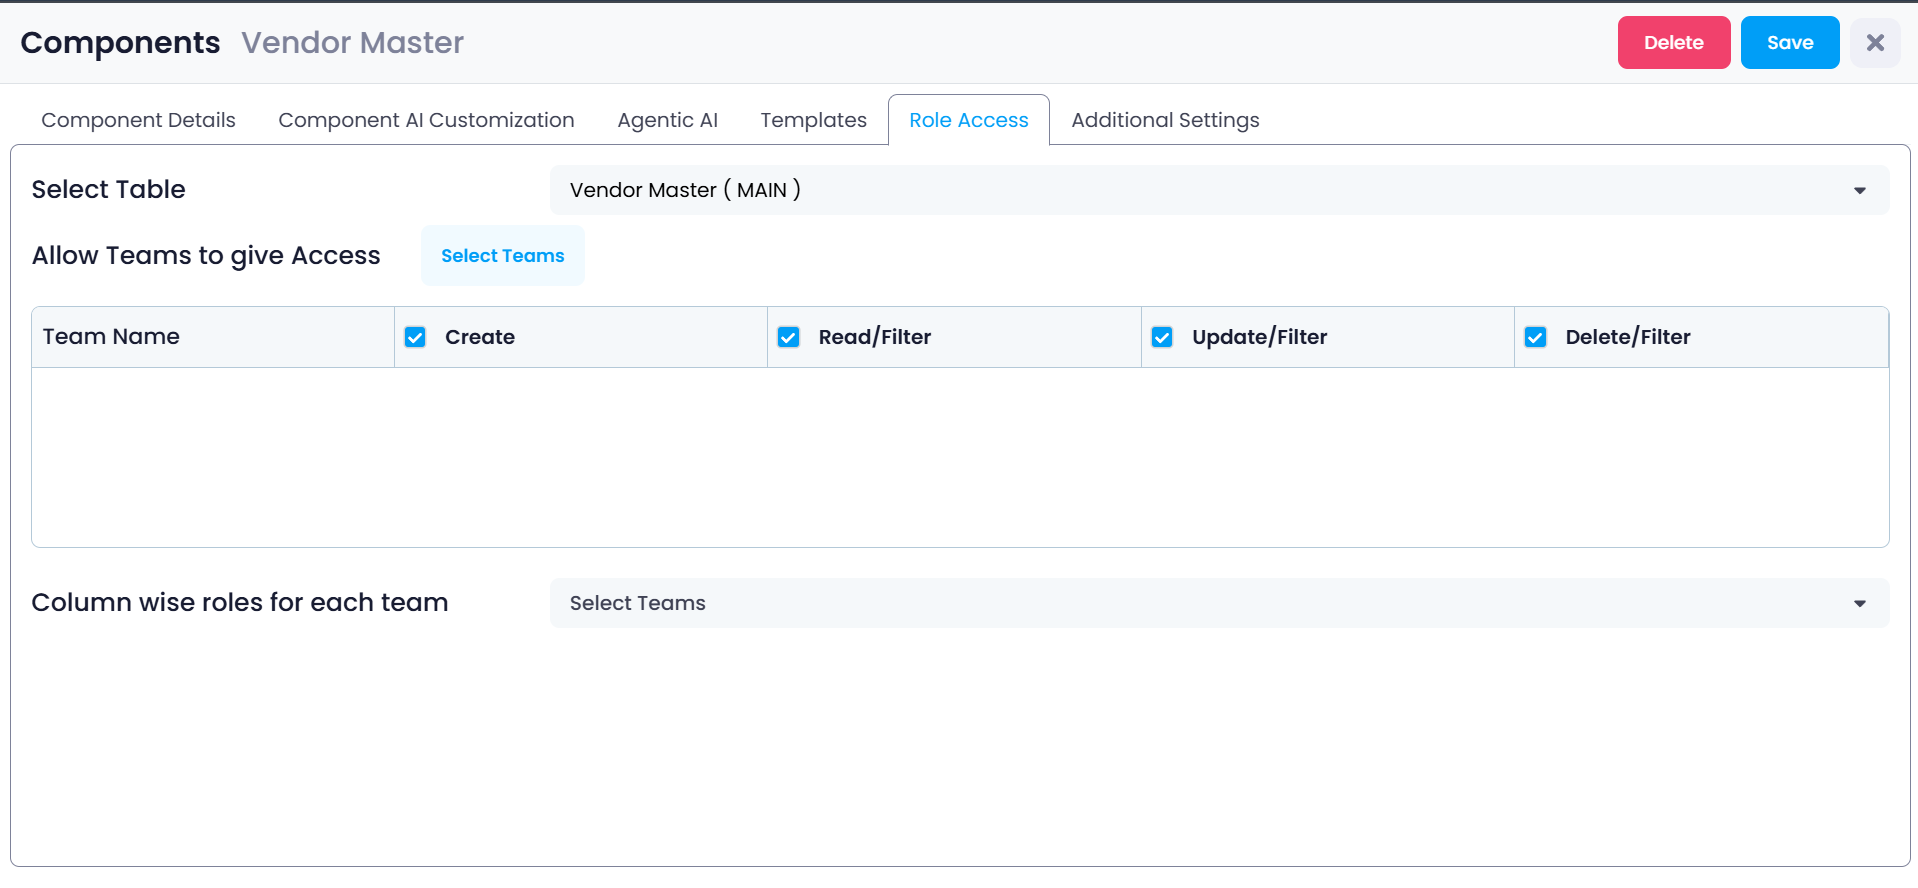
At the top of the Role Access page is the Select Table field.
This field specifies which table within the component the permissions will apply to.
A component is always connected to a main table, and may also include connected tables through relationships such as:
- belongsTo
- hasMany
Example:
Vendor Master (MAIN)This indicates that the permissions being configured will apply to the Vendor Master table, which is the primary data table used by this component.
If the component contains multiple related tables, administrators can select each table and configure permissions individually.
Selecting the correct table is important because access permissions are applied table-by-table.
Allow Teams to Give Access
Below the table selection area is the Allow Teams to give Access section.
This section defines which teams can interact with the selected table and what operations they are allowed to perform.
Before permissions can be assigned, administrators must first choose which teams should have access to this component.
Once teams are selected, their permissions can be configured individually.
Selecting Teams
To assign access permissions:
Step 1: Click the Select Teams button.
Step 2: A list of available teams will appear.
Step 3: Choose the teams that should have access to the component.
Examples of teams may include:
- Procurement
- Finance
- Operations
- Administration
Once teams are selected, they will appear in the permissions table.
Each team will be listed along with a set of permission controls that determine what actions they can perform.
Permission Types
For every selected team, the administrator can enable or disable specific actions.
These permissions determine what users within that team are allowed to do when interacting with records inside the component.
The available permissions include:
- Create
- Read / Filter
- Update / Filter
- Delete / Filter
Each permission controls a specific type of interaction with the data.
Create
The Create permission allows users to add new records to the table.
If this option is enabled, users in the selected team will be able to create new entries within the component.
For example, if the component manages vendors, users will be able to add new vendor records.
Typical examples of created records include:
- Adding a new vendor
- Creating a purchase order
- Entering a new inventory item
If this permission is disabled, users will not see the option to create new records.
Read / Filter
The Read / Filter permission allows users to view records stored in the table.
Users with this permission can open the component and browse existing records.
The Filter capability allows users to search or narrow down results based on conditions.
For example, users might filter vendor records by:
- Vendor Name
- City
- Contract Value
- Vendor Category
This makes it easier to locate specific records inside large datasets.
If this permission is disabled, users will not be able to view the records stored in the component.
Update / Filter
The Update / Filter permission allows users to modify existing records.
This means users can edit information stored in the table.
Examples of updates include:
- Changing vendor details
- Updating contact information
- Modifying addresses
- Updating status fields
Users can also use filters to locate specific records before updating them.
For example:
A user may filter vendors by city and then update contact details for a selected vendor.
If this permission is disabled, users can still view records but will not be able to edit them.
Delete / Filter
The Delete / Filter permission allows users to remove records from the system.
Users can first locate records using filters and then delete them.
Deletion permanently removes the record from the dataset, which is why this permission is typically restricted to:
- System administrators
- Authorized managers
- Data governance roles
If this permission is disabled, users will not be able to delete records.
Column-wise Roles for Each Team
Below the main permissions table is another section called Column-wise roles for each team.
This section provides a more detailed level of access control.
Instead of controlling access to the entire record, administrators can control which columns of the table are visible or editable for each team.
This allows organizations to protect sensitive fields while still allowing teams to interact with the rest of the data.
Column-level access is especially useful when different departments require access to different types of information within the same dataset.
Configuring Column-Level Access
To configure column-level permissions:
Step 1: Open the Column wise roles for each team section.
Step 2: Select the team whose permissions you want to configure.
Step 3: The system will display the list of columns available in the selected table.
Step 4: Define which columns the selected team can access.
Administrators may choose to:
- Allow full access
- Restrict access
- Hide certain fields completely
This allows sensitive fields to remain protected.
Example of Column-Level Restrictions
Consider a vendor management component that contains the following fields:
- Vendor Name
- Address
- Contact Email
- Contract Value
- Credit Limit
In this scenario:
The Procurement team may be allowed to see vendor contact details but not financial values.
The Finance team may be allowed to see financial fields such as contract value and credit limits.
Using column-level permissions ensures that sensitive information is only visible to authorized teams.
This approach prevents unnecessary exposure of financial or confidential data.
Saving Role Access Settings
After configuring the required permissions, the administrator must save the changes.
Step 1: Review the selected teams and permissions.
Step 2: Confirm that each team has the correct access level.
Step 3: Click Save at the top of the page.
Once saved, the system applies the new access rules.
Users will only be able to perform actions that are permitted for their assigned team.
Why Role Access is Important
Role Access is a critical part of system governance.
It ensures that users only interact with the data necessary for their role while preventing unauthorized actions.
Properly configured role access provides:
- Improved data security
- Controlled data modification
- Protection of sensitive information
- Clear operational responsibility
- Structured data governance
By defining team-based permissions and column-level restrictions, Supista allows organizations to maintain structured, secure, and well-governed operational systems.
Role Access ensures that each team interacts with system data according to their operational responsibilities and security requirements.