Create New Module
Creating a module manually allows administrators to design the ERP structure with complete control over its hierarchy, organization, and functional components. This process defines how business workflows, screens, and data interactions are structured inside the Supista platform.
When a new module is created, the administrator builds the system step-by-step by defining:
- The Module Identity
- The Screen Groups
- The Screens
- The Components attached to each screen
This layered structure ensures that modules remain organized, scalable, and easy to navigate as the ERP environment grows.
Accessing the Create Module Interface
Follow these steps to begin creating a module.
Step 1: Open the left navigation sidebar.
Step 2: Click Modules.
Step 3: On the Modules page, click Create New Module.
The Create Module interface will open.

This interface is divided into two sections:
Left Panel — Module Structure
Displays the hierarchical structure being built:
- Module Name
- Screen Groups
- Screens
Right Panel — Configuration Area
Displays the configuration form for whichever element is currently being created or edited.
Step 1 — Define the Module Identity
The first stage is to configure the basic identity of the module.
The administrator defines the following fields.
Module Name
This is the official name of the module.
It appears:
- In navigation menus
- In module cards on the Modules dashboard
- Across system references
Example module names:
- Procurement Management
- Inventory Control
- Finance and Accounting
- Vendor Management
Clear naming ensures users immediately understand the module’s purpose.
Icon
Each module can be assigned a Font Awesome icon class.
The icon visually represents the module in the user interface.
Examples include:
fa-shopping-cartfa-cogsfa-industryfa-boxes
Icons improve visual navigation and help users identify modules quickly.
Icon Color
The Icon Color determines the visual color applied to the module icon.
This helps visually differentiate modules within the ERP environment.
For example:
- Procurement modules may use blue
- Finance modules may use green
- Manufacturing modules may use orange
Consistent visual coding improves usability in systems containing many modules.
Description
The Description field documents the purpose of the module.
This helps administrators and system architects understand:
- What business process the module supports
- What operational activities occur within it
- How it fits into the broader ERP structure
Example description:
Manages procurement workflows including vendor onboarding,
purchase orders, approvals, and procurement reporting.
Maintaining clear descriptions is particularly important in large organizations where multiple administrators manage the system.
Save Module Button
The Save Module button saves the module configuration and activates it within the system.
However, administrators usually define the module structure first before saving.
Step 2 — Create Screen Groups
Once the module identity is defined, the next step is to create Screen Groups.
Screen groups organize screens into logical clusters.
Without screen groups, a module with many screens would become difficult to navigate.
Example Screen Groups
In a Procurement Module, screen groups might include:
- Vendor Management
- Purchase Orders
- Approval Workflow
- Procurement Reports
Each screen group organizes related functionality.
Creating a Screen Group
Step 1: Click Add screen group.
The Create Screen Group interface appears.
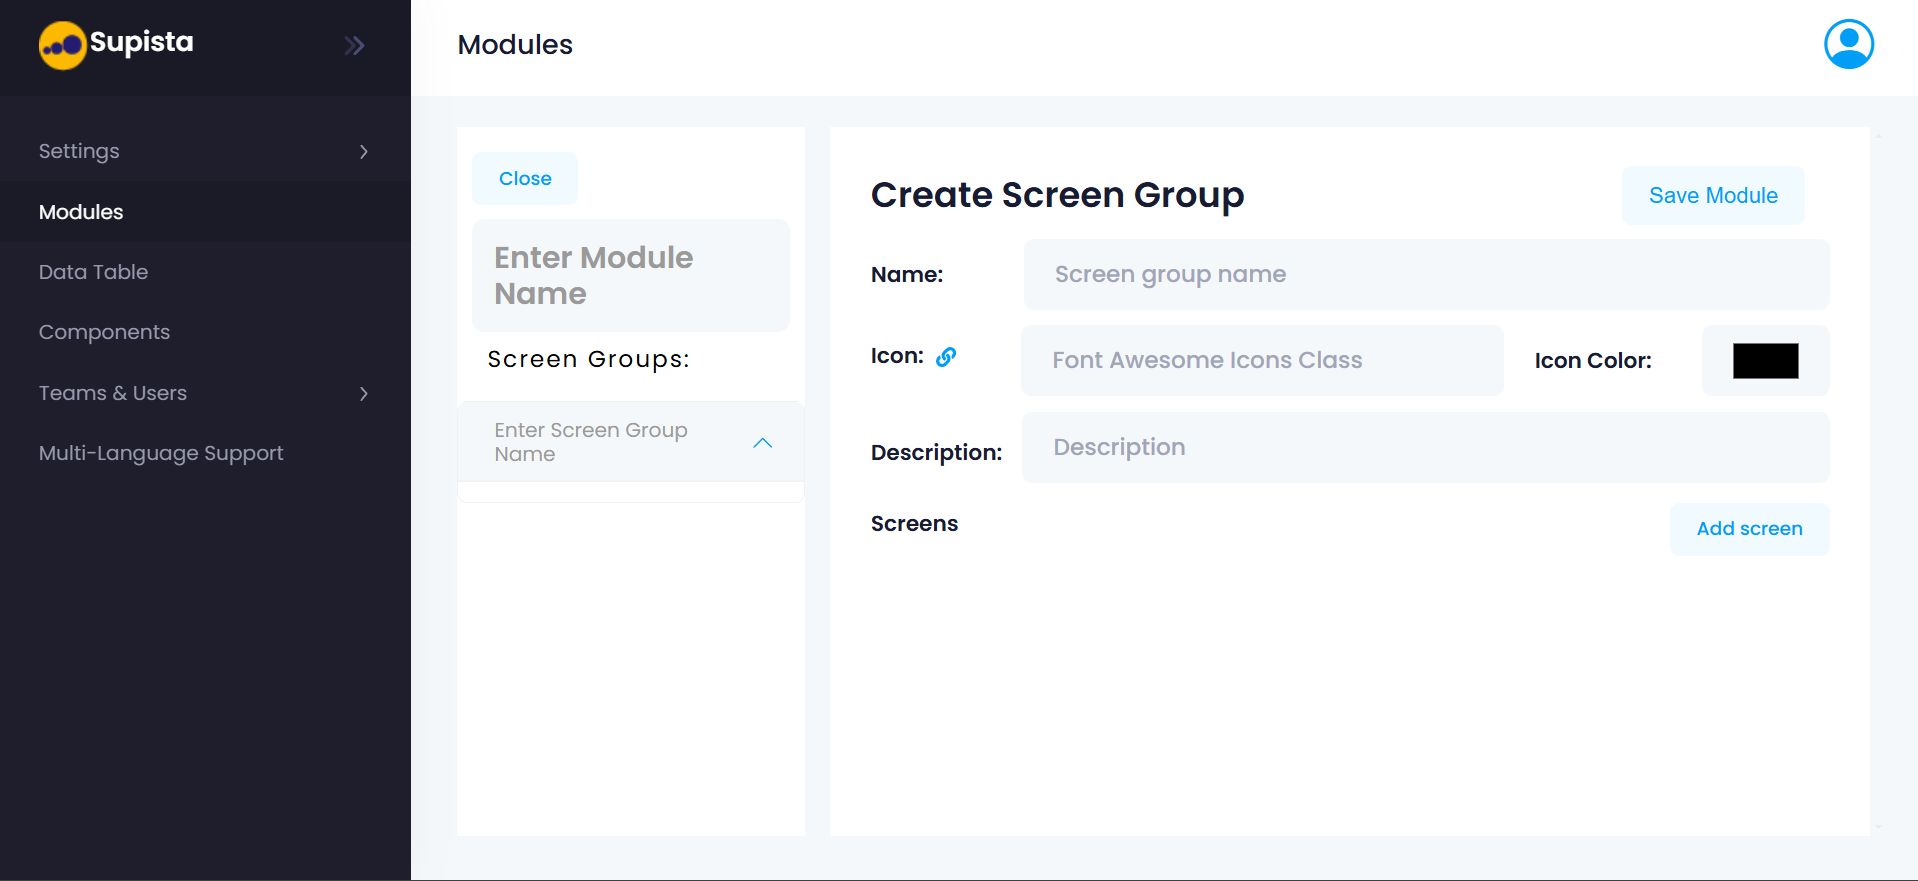
Step 2: Enter the Screen Group Name.
Example:
Vendor Management
Step 3: Select an Icon.
Icons help users visually recognize the category.
Step 4: Choose an Icon Color.
This color appears alongside the icon.
Step 5: Enter a Description.
Example:
Contains all vendor related screens including vendor master,
vendor onboarding, and vendor evaluation.
Step 6: Click Save Module to confirm the screen group.
The screen group will now appear in the left structure panel under the module.
Step 3 — Create Screens
Screens are the operational interfaces inside a module.
Each screen allows users to perform specific actions such as:
- Viewing records
- Entering new data
- Approving transactions
- Generating reports
Screens are always created inside a screen group.
Creating a Screen
Step 1: Select the screen group where the screen should be added.
Step 2: Click Add screen.
The Create Screen interface will open.
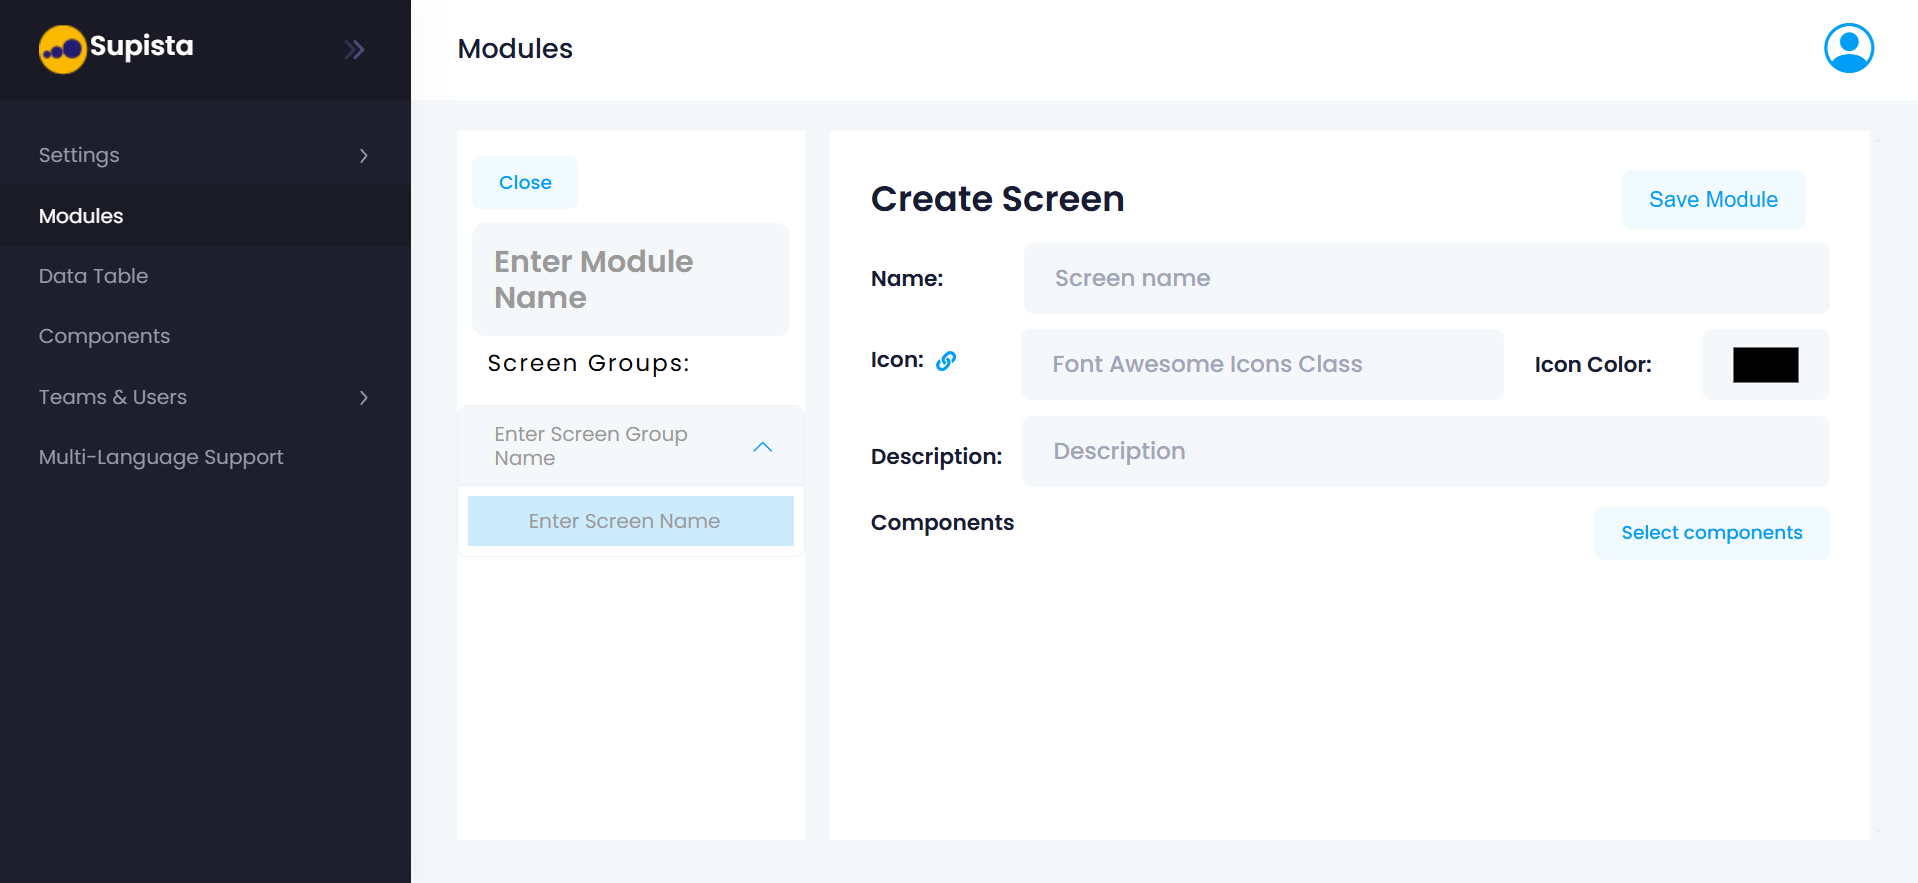
Screen Configuration Fields
The administrator defines the following fields.
Screen Name
This is the name displayed to users in the interface.
Examples:
- Vendor Master
- Purchase Order List
- Invoice Approvals
- Procurement Dashboard
Clear naming ensures users understand the screen’s function.
Icon
The screen icon visually represents the screen in menus.
Example icons:
fa-usersfa-file-invoicefa-listfa-check-circle
Icon Color
The color applied to the screen icon.
This helps visually distinguish screens within the module.
Description
The description explains the purpose of the screen.
Example:
Displays vendor records and allows administrators
to create, edit, or deactivate vendors.
Step 4 — Assign Components
A screen becomes functional only when components are attached to it.
Components define:
- The data model
- Available fields
- Business logic
- CRUD operations (Create, Read, Update, Delete)
Selecting Components
Step 1: Click Select components.
A Screen Components modal window will open.
This window displays all available components within the platform.
Components Selection Interface
The modal contains:
Component List
Each component represents a functional data entity.
Examples from the interface include:
- Terms and Conditions
- Leave Master
- Payment Terms Master
- Raw Materials
- Journal Voucher
- Item Category Master
- Customer Master
- General Ledger
- Asset Master
- Sales Returns
Each component appears as a selectable tile.
Selecting a component attaches it to the screen.
Search Component
The search bar at the top allows users to quickly locate a component.
This is useful when the system contains many components.
Example search:
Customer
This filters components such as Customer Master.
Selecting Components
To assign a component:
Step 1: Click the component tile.
A checkmark will appear indicating it has been selected.
Step 2: Select all required components.
Multiple components can be attached to a single screen.
Example:
A Purchase Order screen might include:
- Vendor Master
- Item Master
- Payment Terms
- Purchase Order Line Items
Step 3: Close the modal after selecting components.
The selected components are now linked to the screen.
Step 5 — Save the Module
After completing the structure:
- Module Identity
- Screen Groups
- Screens
- Components
The administrator finalizes the configuration.
Step 1: Click Save Module.
The module will now become active in the system.
It will appear in the Modules dashboard as a new module card.
Users with appropriate permissions can now access the module and begin using its screens.
Resulting Module Structure
After configuration, the module hierarchy will appear like this:
Procurement Management
└── Vendor Management (Screen Group)
└── Vendor Master (Screen)
└── Components
├── Vendor Master
├── Payment Terms
└── Terms and Conditions
This structure ensures that business functionality remains organized and scalable.
Summary
Manual module creation allows administrators to design ERP functionality with complete architectural control.
Through this process, administrators define:
- The module identity
- Screen groups that organize functionality
- Screens that represent operational interfaces
- Components that power data interactions
This structured approach ensures Supista modules remain organized, scalable, and aligned with real business workflows.