General Settings
The General Settings page defines the core system configuration for a Supista workspace. These settings determine how the environment is identified, how users authenticate, how data is formatted, and how the interface appears across the platform.
All configurations applied here affect the entire workspace and are reflected across all modules, data tables, components, and users operating within the environment.
Administrators typically configure these settings during the initial setup of a workspace or when updating system-wide policies such as authentication duration, interface appearance, or branding.
How to Access General Settings
Step 1: Open the left navigation sidebar.
Step 2: Click Settings.
Step 3: Select General Settings from the Settings menu.
The General Settings page will open, displaying the configuration fields used to control the workspace behavior.
General Settings Interface
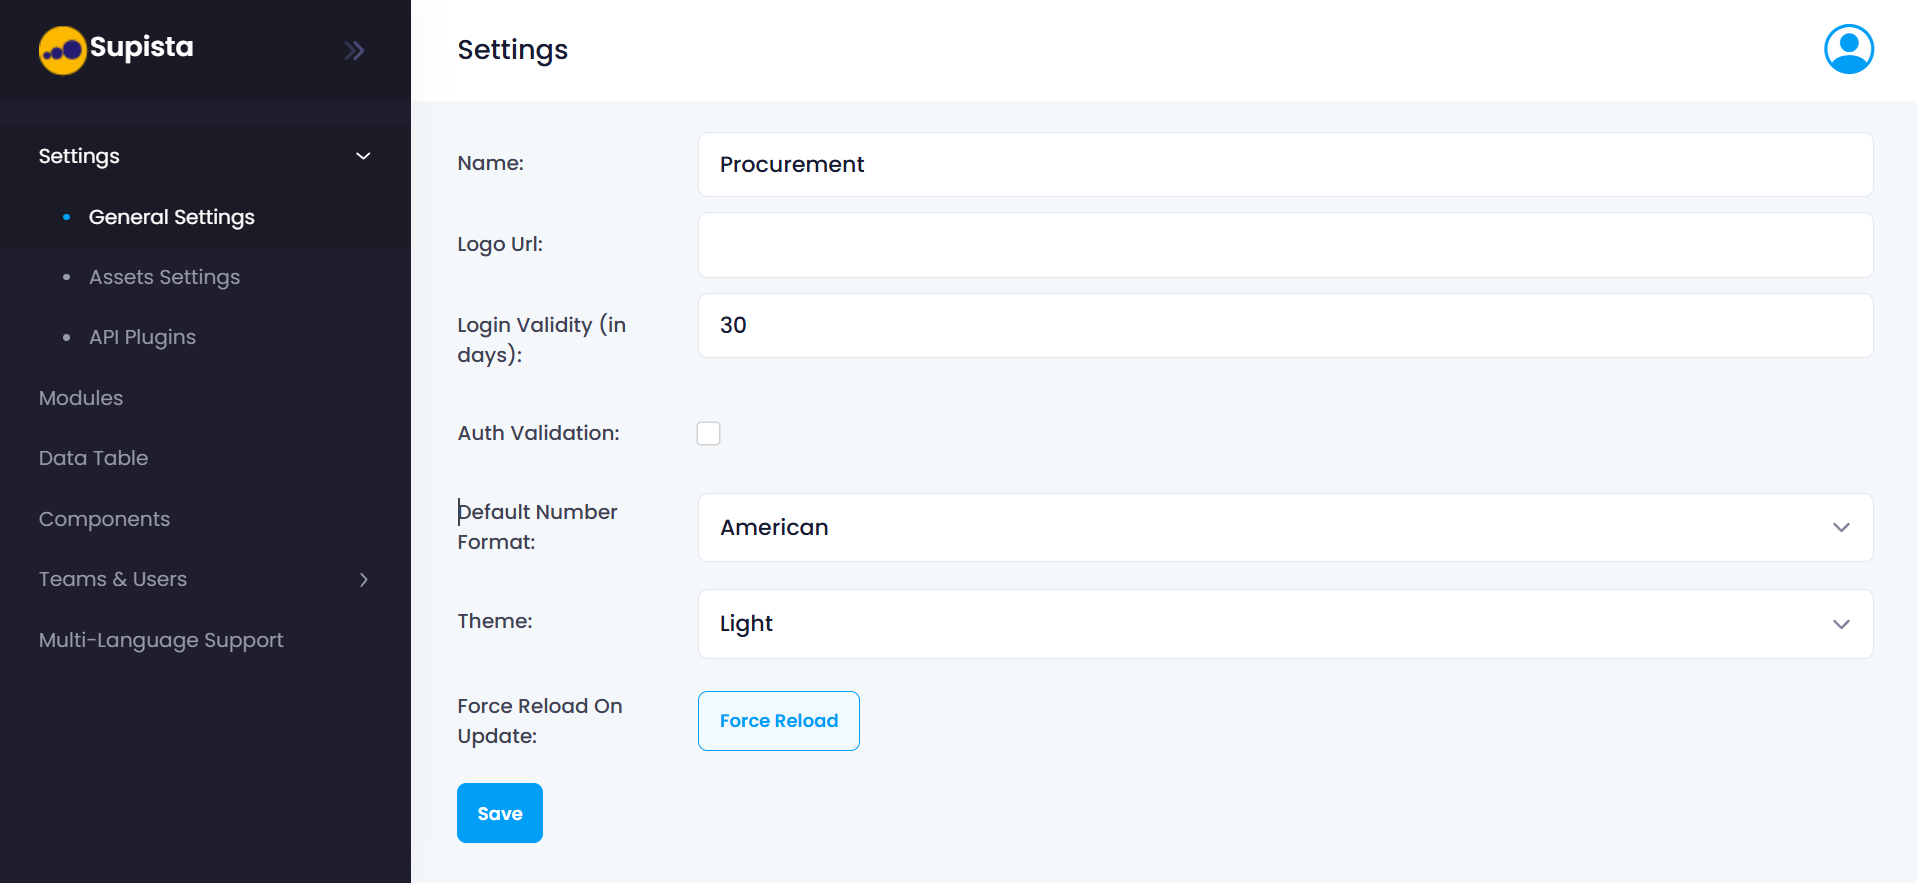
General Settings Fields
Each field on this page controls a specific aspect of the platform.
1. Workspace Name
The Name field represents the identity of the workspace.
This name is used to identify the current Supista deployment and may appear across administrative interfaces and configuration references.
For organizations managing multiple environments or deployments, this helps distinguish one workspace from another.
Steps to Update Workspace Name
Step 1: Locate the Name field at the top of the page.
Step 2: Enter the desired workspace name.
Step 3: Verify the name reflects the correct environment or organization.
Step 4: Click Save to apply the change.
2. Logo URL
The Logo URL field allows administrators to apply organizational branding to the platform.
By providing a valid image URL, the workspace can display a company logo across relevant parts of the interface.
This helps ensure the platform visually represents the organization using it.
Steps to Configure Workspace Logo
Step 1: Locate the Logo URL field.
Step 2: Paste the URL of the logo image.
Step 3: Ensure the image is accessible and publicly reachable.
Step 4: Click Save to apply the logo to the workspace.
3. Login Validity (in Days)
The Login Validity setting determines how long a user's authentication session remains active.
For example:
- If the value is 30, users will remain logged in for 30 days unless they manually log out.
- After the validity period expires, users must authenticate again.
This setting helps balance security and user convenience.
Shorter durations increase security by requiring more frequent login verification, while longer durations allow uninterrupted access for users.
Steps to Configure Login Validity
Step 1: Locate the Login Validity (in days) field.
Step 2: Enter the number of days a login session should remain active.
Step 3: Confirm the value aligns with your organization's security policy.
Step 4: Click Save to update the login validity configuration.
4. Auth Validation
The Auth Validation checkbox enables additional authentication controls within the workspace.
When enabled, the system may enforce stronger verification checks depending on the platform configuration and security requirements.
Organizations operating under strict governance or compliance frameworks may enable this option to strengthen authentication procedures.
Steps to Enable Auth Validation
Step 1: Locate the Auth Validation checkbox.
Step 2: Click the checkbox to enable authentication validation.
Step 3: Review any associated authentication policies if applicable.
Step 4: Click Save to apply the change.
5. Default Number Format
The Default Number Format setting determines how numerical values are displayed throughout the platform.
This includes:
- Dashboards
- Reports
- Data tables
- Exports
- Financial data
Selecting the correct number format ensures numbers appear according to regional or organizational standards.
For example:
- Indian Format: 1,00,000
- International Format: 100,000
Steps to Configure Default Number Format
Step 1: Locate the Default Number Format dropdown.
Step 2: Click the dropdown menu.
Step 3: Select the preferred number format.
Step 4: Click Save to apply the configuration.
6. Theme
The Theme setting controls the visual appearance of the platform interface.
Users can choose between available display modes such as:
- Light Mode
- Dark Mode
Changing the theme adjusts the visual styling of the interface without affecting platform functionality.
Steps to Change the Interface Theme
Step 1: Locate the Theme dropdown field.
Step 2: Click the dropdown menu.
Step 3: Select the preferred theme option.
Step 4: Click Save to apply the selected theme.
7. Force Reload on Update
The Force Reload on Update option ensures that configuration changes take effect immediately across all active sessions.
In some cases, users may need to refresh their interface to see updated settings. This feature forces the system to reload configurations automatically.
This is particularly useful when administrators update critical settings that must apply instantly.
Steps to Force Reload the System Configuration
Step 1: Make the necessary changes in the General Settings page.
Step 2: Click the Force Reload button.
Step 3: The platform reloads configuration settings across active sessions.
Saving Configuration Changes
After making changes to any field in the General Settings page:
Step 1: Review all updated values.
Step 2: Click the Save button.
Step 3: The system stores and applies the updated configuration.
If required, use Force Reload to immediately propagate the changes across the platform.
Summary
The General Settings section establishes the foundational configuration of a Supista workspace. It defines the workspace identity, session policies, authentication behavior, numerical formatting standards, and interface appearance.
Proper configuration of these settings ensures that the platform operates consistently, aligns with organizational standards, and provides a secure and usable environment for all users.