Data Tables
The Data Table section in Supista defines the structure of how information is stored and managed across the platform. While Modules organize business workflows and Components display data in user interfaces, Data Tables define the underlying data model that powers the entire system.
Every record created in Supista — whether it appears inside a module, component, or workflow — originates from a data table. Because of this, data tables serve as the foundation of the platform’s data architecture.
A properly designed table ensures:
- Structured and consistent data storage
- Reliable validation of user input
- Efficient filtering and searching
- Accurate relationships between different business entities
In technical terms, a data table functions similarly to a database schema. It defines:
- Columns — the fields that store information
- Data Types — the format in which data is stored
- Validations — rules that ensure data accuracy
- Indexes — structures that improve query performance
- Relationships — connections between different tables
Internally, Supista uses a Table ID to reference tables across the system. While administrators interact with tables using their table name, the platform relies on the Table ID for all internal operations. This ensures stability even if a table is renamed later.
Accessing the Data Table Section
Step 1: Open the left navigation sidebar.
Step 2: Click Data Table.
The system opens the Data Table dashboard, which displays all existing tables within the system.
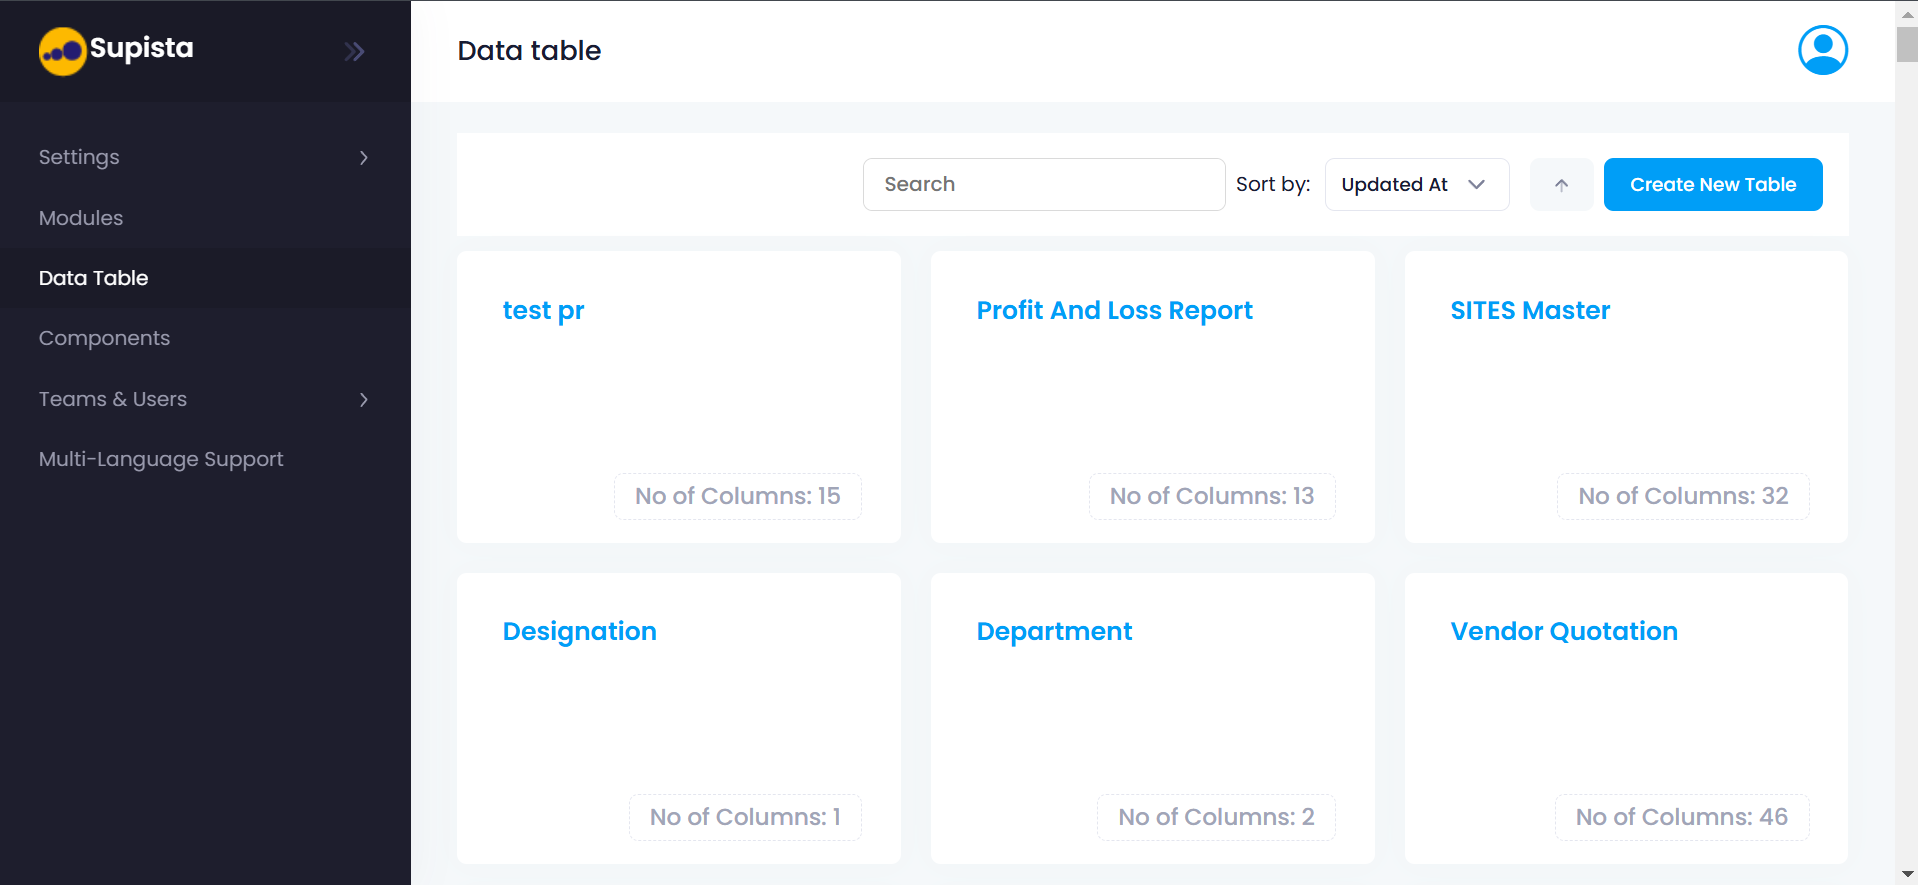
Each table appears as a card displaying:
- The table name
- The number of columns defined within the table
Additional tools are available to help manage large numbers of tables:
- A Search bar allows administrators to quickly locate tables.
- A Sort By dropdown organizes tables by:
- Updated At
- Created At
- Name
This interface provides a centralized overview of all database structures used within Supista.
Creating a New Data Table
To create a new table, use the Create New Table button.
Step 1: Navigate to the Data Table section.
Step 2: Click Create New Table.
A modal window appears with two available options:
- Upload File
- Create Table Manually
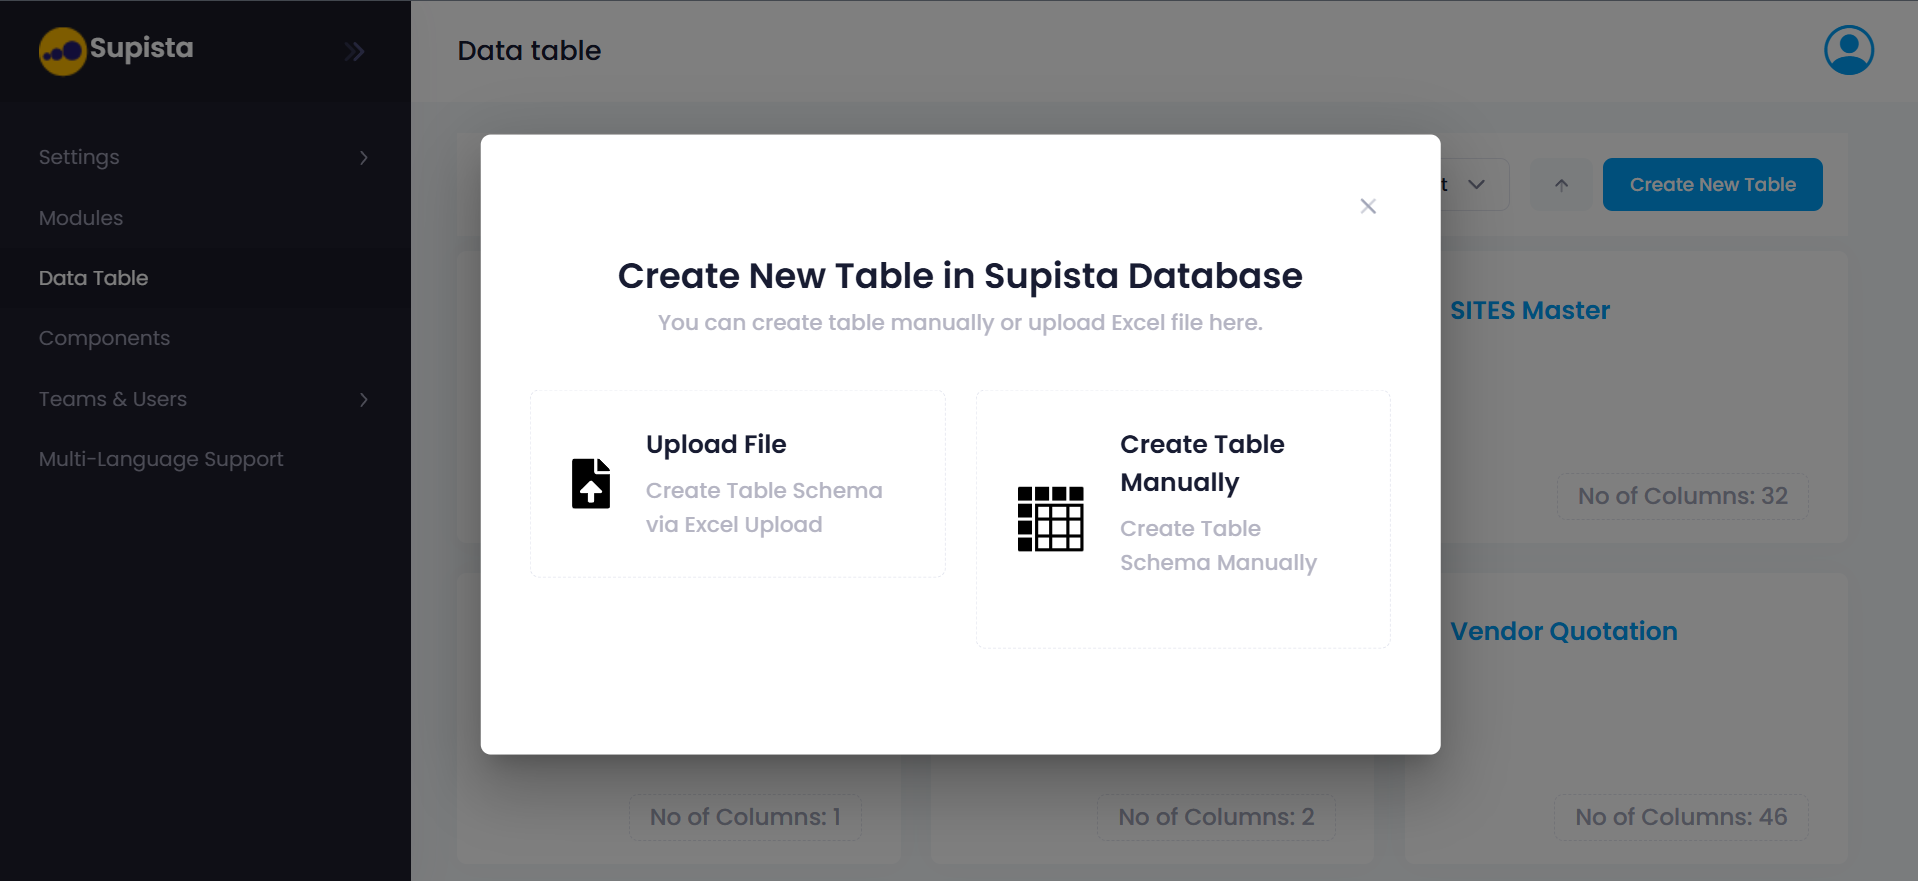
These two options provide flexibility depending on how the table structure is defined.
Upload File
This option allows administrators to upload an Excel file containing column definitions. Supista automatically generates the table schema based on the spreadsheet structure.
Create Table Manually
This option allows administrators to manually define the table structure directly within the platform.
Creating a Table Manually
When Create Table Manually is selected, Supista opens the table configuration interface.
Step-by-Step Process
Step 1: Click Create New Table
Step 2: Select Create Table Manually
The table configuration form appears.
Step 3 — Enter the Table Name
The table name must be unique within the system.
No two tables can share the same name. The name should clearly represent the data stored in the table.
Examples include:
- Employees
- Vendors
- PurchaseOrders
Although administrators reference tables using the table name, Supista internally uses a Table ID to identify tables during system processes.
Step 4 — Add Tags (Optional)
Tags are used to categorize tables and improve searchability.
When many tables exist in the system, tags allow administrators to quickly filter and locate specific tables.
Examples include:
- Finance
- HR
- Procurement
- Inventory
Tags are purely organizational and do not affect system functionality.
Step 5 — Add a Description (Optional)
The description field provides context about the table's purpose. Writing clear descriptions helps other administrators understand how the table is used.
Example:
Stores employee records including department, role, and joining date.
Step 6 — Proceed to Column Configuration
Click Next to begin defining the columns of the table.
A table cannot be saved without at least one column.
However, Supista does not impose a fixed limit on the number of columns a table can contain.
Columns
Columns define the structure of the table. Each column represents a specific type of information stored for every record.
For example, an employee table might contain columns such as:
- Employee Name
- Department
- Role
- Date of Joining
Each column defines:
- The type of data stored
- The validations applied
- Optional default values
- Optional formatting rules
Adding a Column
Step 1: Open the table you want to configure.
Step 2: Click Add Column.
The column configuration panel appears.
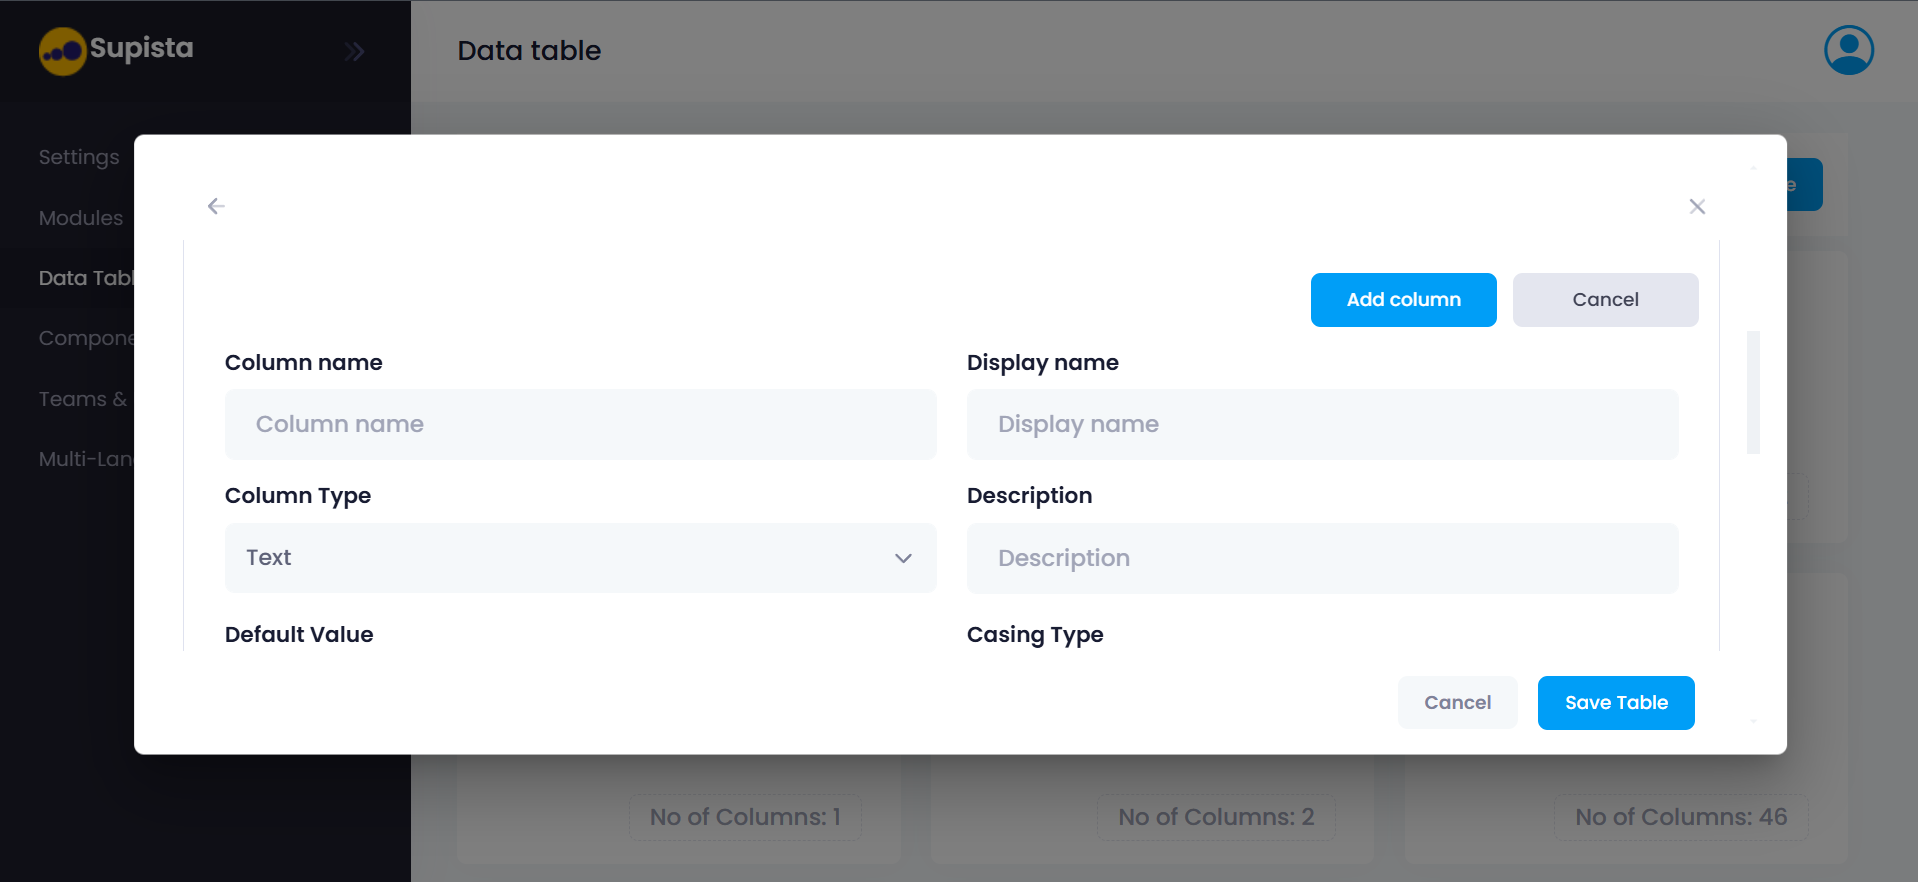
Column Name
The Column Name is the internal identifier used within the database.
Example:
employee_id
department_id
joining_date
Column names typically follow lowercase naming conventions with underscores.
Display Name
The Display Name controls how the column appears to users within the interface.
Example:
| Column Name | Display Name |
|---|---|
| employee_id | Employee ID |
This separation allows developers to use technical naming conventions while maintaining clear labels for users.
Column Type
The Column Type determines the format in which data is stored.
It also controls:
- Input behavior
- Allowed validations
- Formatting rules
Data Types
Supista supports a wide range of data types designed for operational systems.
ID
Every table automatically includes an ID field.
This field:
- Is created automatically
- Cannot be selected manually
- Is not visible during column creation
- Serves as the primary identifier for records
Text
Stores standard textual values such as:
- Names
- Codes
- Titles
Text fields support automatic casing transformations, allowing input to be formatted automatically.
Supported casing formats include:
- camelCase
- PascalCase
- snake_case
- SCREAMING_SNAKE_CASE
- kebab-case
- lowercase
- UPPERCASE
- Title Case
- Sentence case
This ensures consistency across stored values.
Textarea
Used for longer text input such as:
- Comments
- Descriptions
- Notes
Rich Text
Rich Text provides a formatted text editor used for structured content.
Common uses include:
- Product descriptions
- Detailed documentation
- Long form text
The value entered is stored internally as HTML.
Rich Text fields support only the Is Required validation.
HTML
The HTML data type allows administrators to write HTML and CSS directly.
This provides greater flexibility for advanced formatting scenarios.
Supported validation:
- Is Required
Number (Integer)
Stores numeric values such as:
- Quantities
- Counts
- Identifiers
Number fields support configurable number formatting styles.
Supported Number Formats
| Format | Example |
|---|---|
| American | 1,000,000 |
| Indian | 10,00,000 |
| European | 1.000.000 |
The default format is American.
Decimal
Used when numeric values require decimal precision.
Examples include:
- Financial values
- Measurements
- Prices
Date
Stores calendar date values.
Example uses include:
- Invoice date
- Joining date
- Birth date
Time
Stores time values independently of a date.
Date and Time
Stores both date and time together.
Mobile
The Mobile data type is used to store phone numbers.
Key characteristics:
- Numeric values only
- Alphabetic characters are not allowed
- Default country code can be configured
Switch
Represents Boolean values.
Possible values:
- True
- False
Common uses include status indicators such as:
- Active / Inactive
- Enabled / Disabled
Select
Creates a dropdown list of predefined options.
Each option contains two values:
| Property | Description |
|---|---|
| Label | Visible to users |
| Value | Stored internally |
Example:
| Label | Value |
|---|---|
| Approved | approved |
| Rejected | rejected |
Select fields also support color indicators to improve visibility.
By default, the color assigned to options is blue, though color display can be configured.
Multiple Select
Allows users to select multiple values from a dropdown list.
File
Used for uploading files.
Administrators can define:
- Maximum file size
- Allowed file types
If no file type restriction is specified, users may upload any file type.
Image
Specifically designed for image uploads.
Multiple Files Upload
Allows multiple files to be uploaded simultaneously.
Maximum allowed uploads:
10 files
Multiple Images Upload
Allows multiple images to be uploaded simultaneously.
Maximum allowed uploads:
10 images
Video
Stores uploaded video files.
Audio
Stores uploaded audio files.
Camera
Allows capturing images directly using a device camera.
Important behavior:
- Available only in the mobile application
- Disabled on the web interface
If Geolocation is enabled, captured images automatically include:
- The user's current location
- Timestamp of capture
QR Scanner
Allows scanning QR codes using the device camera.
Location
Stores geographic coordinates.
Internally the location is stored as two values:
- X coordinate
- Y coordinate
However, users typically interact only with the X coordinate field in the interface.
Supista also supports Live Location tracking:
- On the web platform, location values cannot be edited manually.
- On the mobile application, once permission is granted, the location can be captured continuously.
User
Stores the User ID associated with a record.
Internally, the value stored is the numeric identifier of the selected user.
Multiple Users
Allows selecting multiple users within a single field.
System Fields
Supista automatically maintains several system fields for auditing and tracking purposes.
These include:
- Created At Date
- Created At Time
- Updated At Date
- Updated At Time
- Created By
- Last Updated By
These fields are automatically populated by the system and are read-only.
Column Validations
Validations ensure that data entered into a column meets specific rules.
Examples include:
- Is Required
- Is Length
- Is Email
- Is Numeric
- Is Range
- Is Alphabet
- Is Uppercase
- Is Lowercase
- Is Currency
- Is Date
- Is Time
- Is DateTime
- Is Mobile
- Is URI
Validation rules depend on the selected data type.
For example:
- Mobile fields allow only numeric values
- Date fields enforce valid date formats
- Number fields enforce numeric input
If a validation rule fails, the system displays an error and prevents the record from being saved.
Default Values
Default values allow a column to automatically populate when a new record is created.
Examples include:
- Default dates
- Default time values
- Default select options
- Default user values
- Default country code for mobile numbers
These defaults help reduce manual input and maintain consistency across records.
Read-Only Columns
A column can be configured as Read-Only, meaning its value cannot be edited once it has been set.
Read-only columns are commonly used for:
- System generated values
- Audit fields
- Automatically calculated fields
Adding Column Indexes
Indexes improve database performance by speeding up search and filter operations.
Without indexes, the database must scan every record when performing queries. Indexes allow Supista to locate records more efficiently.
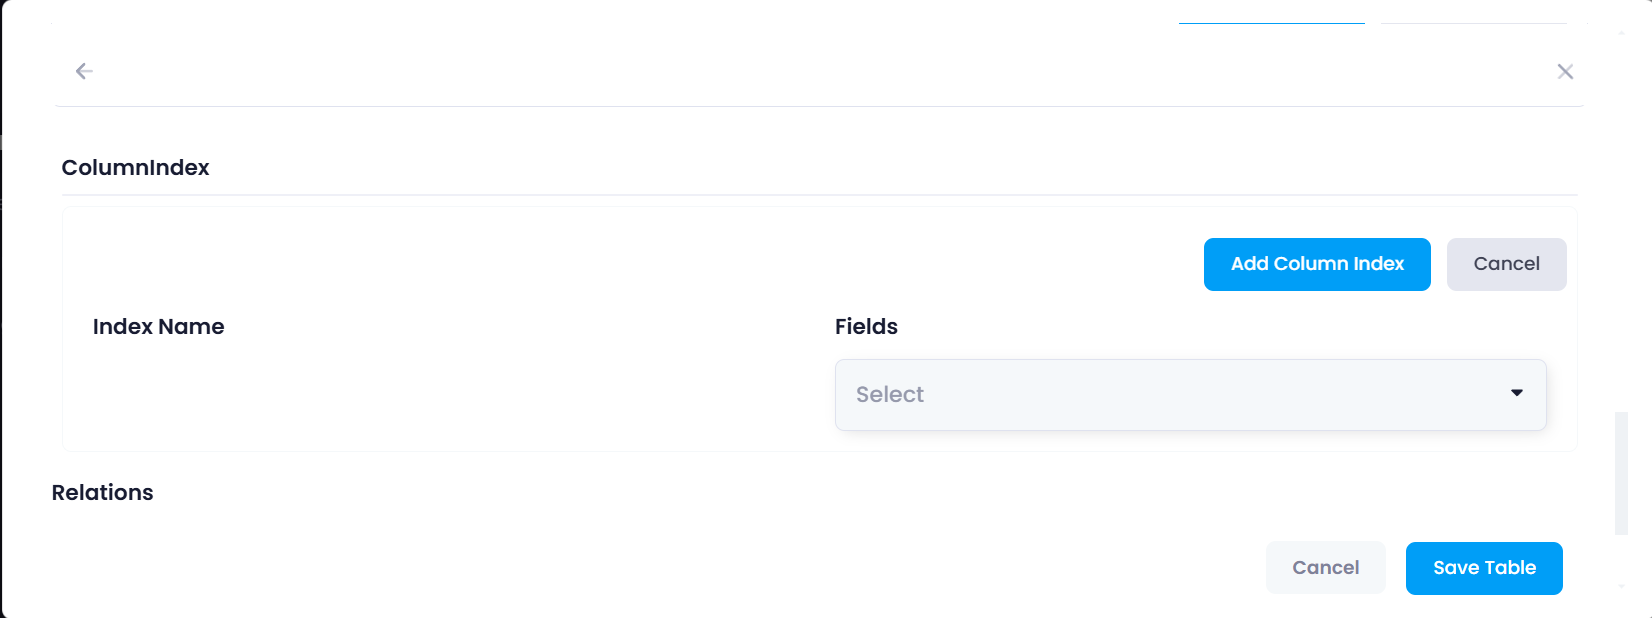
Step-by-Step Index Creation
Step 1: Open the table you want to edit.
Step 2: Scroll to the ColumnIndex section.
Step 3: Click Add Column Index.
Indexes can include:
- A single column
- Multiple columns
Indexes are commonly used for fields that are frequently searched or filtered.
Creating Table Relationships
Tables in Supista can be connected using relations. These relationships allow records in one table to reference records in another.
This is essential for modeling complex business structures.
Examples include:
- Employees linked to Departments
- Orders linked to Customers
- Purchase Orders linked to Vendors
Step-by-Step Relation Creation
Step 1: Open the table you want to edit.
Step 2: Scroll to the Relations section.
Step 3: Click Add Relation.
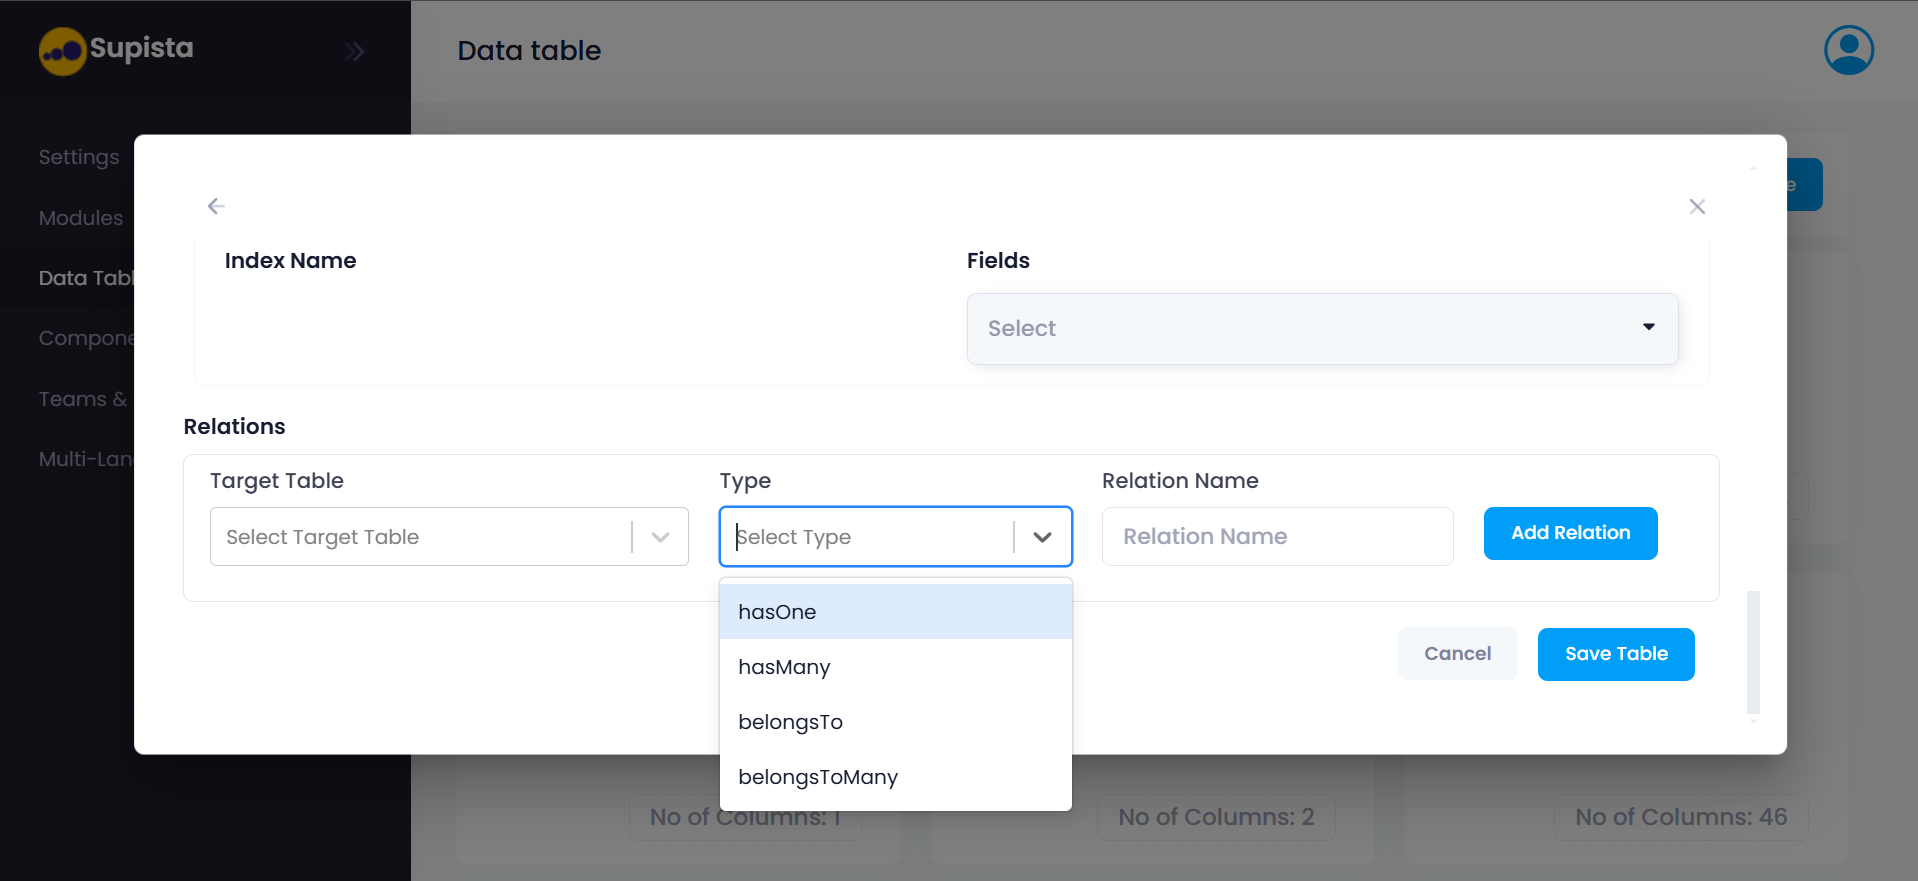
The relation configuration form appears.
Step 4: Select the Target Table.
Step 5: Select the Relation Type.
Step 6: Enter the Relation Name.
Example:
employee_department_relation
Step 7: Click Add Relation.
When the belongsTo relation type is used, Supista automatically creates an additional column to store the referenced record.
Types of Relationships
Supista supports several relationship types.
hasOne
One record in the current table is associated with exactly one record in another table.
Example:
A User has one Profile.
hasMany
One record in the current table can be associated with multiple records in another table.
Example:
A Department has many Employees.
belongsTo
The current table references a record in another table.
Example:
An Employee belongs to a Department.
This relationship automatically creates a reference column.
belongsToMany
Records in both tables can connect to multiple records in the other table.
Example:
Students and Courses.
- One student can enroll in multiple courses.
- One course can contain multiple students.
This relationship uses an intermediate linking table.
Saving the Table
After configuring:
- Columns
- Validations
- Indexes
- Relations
the final step is to save the schema.
Final Steps
Step 1: Review the table structure.
Step 2: Click Save Table.
Once saved, the table becomes part of the Supista database.
The table can now be used by:
- Components
- Screens
- Modules
---